How to Display Author Profile Under Articles

This feature is optional which means you can use it or not. If you notice at the end of each article in this template, a short author profile is always displayed which contains a photo of the name and a link to the blogger profile.
For those of you who want to activate this feature, please follow the tutorial below:
Added author profile under the artillle
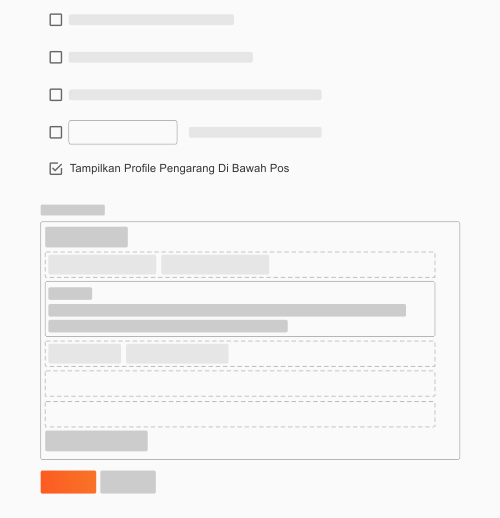
First of all open the menu ‘Layout‘on blogger and then click edit on the blog post widget. A new window will appear containing the widget settings as shown:

Scroll through the widget window and find ‘Show Author Profile Under Posts‘, click the check mark next to the post to activate the author profile as shown:

Click save and see the changes.
I want to change the link on the profile widget to my social media account link, is that possible?
Note:
The toturial below is no longer relevant to the latest version of the Fletro Pro template
By default, the author’s profile, either on the sidebar widget or at the bottom of the article, will display the blogger profile link.
Because the blogger profile view is very simple, it also displays a list of managed blogs (although you can choose not to display a blog list) which is the reason some bloggers don’t like it.
But you can modify or change it with other links, for example: Facebook, Instagram, Twitter or other profiles.
1. Edit HTML Template
First click the theme menu on blogger then select ‘Edit HTML’ mode. There will be 2 codes that must be changed, namely for the profile under the article and the profile in the widget section.

2. Author Profile Under Posts
Please find and change the code below, the only thing that needs to be changed is the marked code
<div class="authorFollow"> <a expr:href="https://fletro.imagzplus.com/2019/12/data:post.author.profileUrl" rel="author nofollow" target="_blank" title="View Profile">Profile</a></div>// Ubah bagian yang ditandai dan tambahkan url Anda.<div class="authorFollow"> <a href="https://fletro.imagzplus.com/2019/12/URL_ANDA_DISINI" rel="author nofollow" target="_blank" title="View Profile">Profile</a></div>3. Blogger Profile Widget
Click the dropdown button marked in the image below, then select ‘Profile1‘:

In the widget, please find some of the code below and also replace the url on the widget with the url of your choice.
// Link Pada gambar Profil<b:includable id='userProfileImage'> <div class="profile-image"> <a expr:href="https://fletro.imagzplus.com/2019/12/data:userUrl" rel="nofollow" target="_blank"> <b:include name="profileImage"/> </a> </div></b:includable>// Ubah bagian yang ditandai dan tambahkan url Anda.<b:includable id='userProfileImage'> <div class="profile-image"> <a href="https://fletro.imagzplus.com/2019/12/URL_ANDA_DISINI" rel="nofollow" target="_blank"> <b:include name="profileImage"/> </a> </div></b:includable>// Link Pada Profil Individual<b:includable id='userProfileLink'> <a class="profile-link g-profile" expr:href="https://fletro.imagzplus.com/2019/12/data:userUrl" rel="author nofollow" target="_blank"> <data:displayname/> </a></b:includable>// Ubah bagian yang ditandai dan tambahkan url Anda.<b:includable id='userProfileLink'> <a class="profile-link g-profile" href="https://fletro.imagzplus.com/2019/12/URL_ANDA_DISINI" rel="author nofollow" target="_blank"> <data:displayname/> </a></b:includable>Click Save and see the changes to your template.